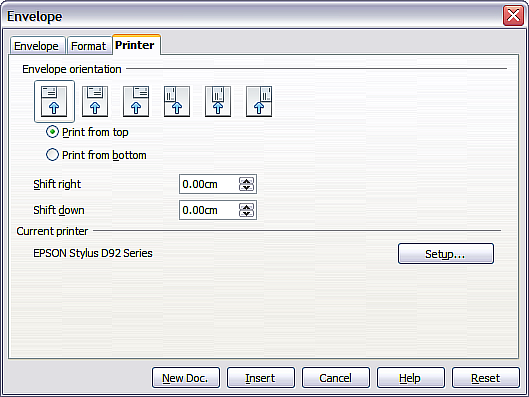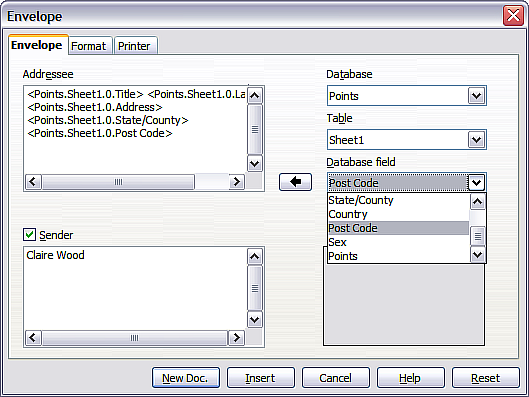
Instead of printing mailing labels, you may wish to print directly onto envelopes. There are two basic ways to create envelopes, one where the envelope is embedded within a letter, generally as the first page (Insert in the Envelope dialog box), and another where the envelope is an independent document (New Doc. in the dialog box). In each case the addressing data may be manually entered, for example by copying and pasting from the letter with which it is associated, or it may originate within an address data source.
This section assumes the use of an address data source and, for convenience, a free-standing envelope.
The production of envelopes involves two steps, setup and printing, as described in this section.
To set up envelopes to be printed with your letters:
| At this stage it is not possible to vary the dimensions of the frames that will hold the Sender and Addressee information, but once the envelope has been created this will become possible and you may wish to make some cosmetic adjustments. |


If you prefer dragging and dropping, than click New Doc., drag your data source headings into the Addressee area on your new envelope and skip to step 7), otherwise continue with steps 5 and 6.


If you don’t want to proceed with this envelope, click Cancel or press the Esc key. You can also click Reset to remove your changes and return to the original settings when the dialog box opened.
| The following procedure is very similar to that used for a similar purpose in the section on printing mailing labels. It is reproduced here for purposes of clarity. |
You will now see that address field separation is created by line breaks , rather than paragraphs . As the suppression of blank address fields depends on hiding paragraphs, not lines, you need to replace line breaks with paragraphs as follows.
If the line spacing in the Addressee area is not satisfactory, you may wish to correct this before proceeding, by modifying the paragraph style associated with the address. Unless you have changed it, the address uses the Default style.
For example, in our Points database the condition to test if the Last Name field is empty would be:
To test for multiple conditions, use the operators AND and/or OR between the conditional statements, for example:
Click Insert, but do not close the dialog until all lines have been amended.
To merge addresses and print the envelopes:
| Content on this page is licensed under the Creative Common Attribution 3.0 license (CC-BY). |